[深度学习]Part1 Python学习进阶Ch24图像处理OpenCV(24.1~24.13)——【DeepBlue学习笔记】
时间:2023-06-17 15:37:00
本文仅供学习使用
Python高级——Ch24图像处理OpenCV(24.1~24.13)
- 24. 图像处理OpenCV
-
- 24.1 读取、显示、保存图像
-
- 24.1.1 图像的基本操作
- 24.1.2 摄像头/视频读取,写入
- 24.1.3 简单实例应用
- 24.2 常用的数据结构和颜色空间
-
- 24.2.1 OpenCV常用数据结构
- 24.2.2 图像基础
- 24.2.3 基本绘图函数
- 24.2.4 访问图像像素
- 24.2.5 对比度亮度调整与通道分离合并
- 24.2.6 图像翻转——Numpy
- 24.3 图像基本运算
-
- 24.3.1 图像算数运算
- 24.3.2 图像逻辑操作
- 24.3.2 图像复制
- 24.4 图像ROI与mask掩码
-
- 24.4.1 感兴趣区域ROI
- 24.4.2 mask—掩码/掩膜操作
- 24.4.3 ROI图像融合
- 24.5 图像几何变换
-
- 24.5.1 图像缩放—cv2.resize()
- 24.5.2 图像平移
- 24.5.3 图像旋转
- 24.5.4 转置和镜像
- 24.5.5 重映射—cv2.remap()
- 24.5.6 图像校正-图像校正-图像校正
- 24.6 OpenCV操作界面事件
-
- 24.6.1 鼠标操作
- 24.6.2 鼠标操作 透视变换
- 24.7 图像滤波
-
- 24.7.1 图像滤波简介
- 24.7.2 方框滤波——cv2.boxFilter()
- 24.7.3 均值滤波——cv2.blur()
- 24.7.4 高斯滤波——cv2.GaussianBlur()
- 24.7.5 中值滤波——cv2.medianBlur()
- 24.7.5 双边滤波——cv2.bilateralFilter()
- 24.8 图像阈值化
-
- 24.8.1 图像阈值介绍
- 24.8.2 固定阈值——`cv2.threshold()`
- 24.8.3 自适应阈值——`cv2.adaptiveThreshold()`
- 24.8.4 Otsu阈值化
- 24.8.5 全局阈值——threshold
- 24.9 图像形态学操作
-
- 24.9.1 膨胀——cv2.dilate()
- 24.9.2 腐蚀——cv2.erode()
- 24.9.3 开运算(open)
- 24.9.4 闭运算(close)
- 24.9.5 形态学梯度(Gradient)
- 24.9.6 顶帽(Top Hat)
- 24.9.7 黒帽(Black Hat)
- 24.10 图像边缘检测
-
- 24.10.1 Canny边缘检测
- 24.10.2 Sobel算子
- 24.10.3 Laplacian算子
- 24.11 霍夫变换及应用
- 24.12 计算和绘制直方图
-
- 24.12.1 图像直方图概述
- 24.12.2 与应用程序相关的直方图
- 24.13 模板匹配与应用
-
- 24.13.1 模板匹配
- 24.13.2 模板匹配——cv2.matchTemplate()
- 24.13.3 矩阵归一化——cv2.normalize()
- 24.13.4 寻找最值——cv2.minMaxLoc()
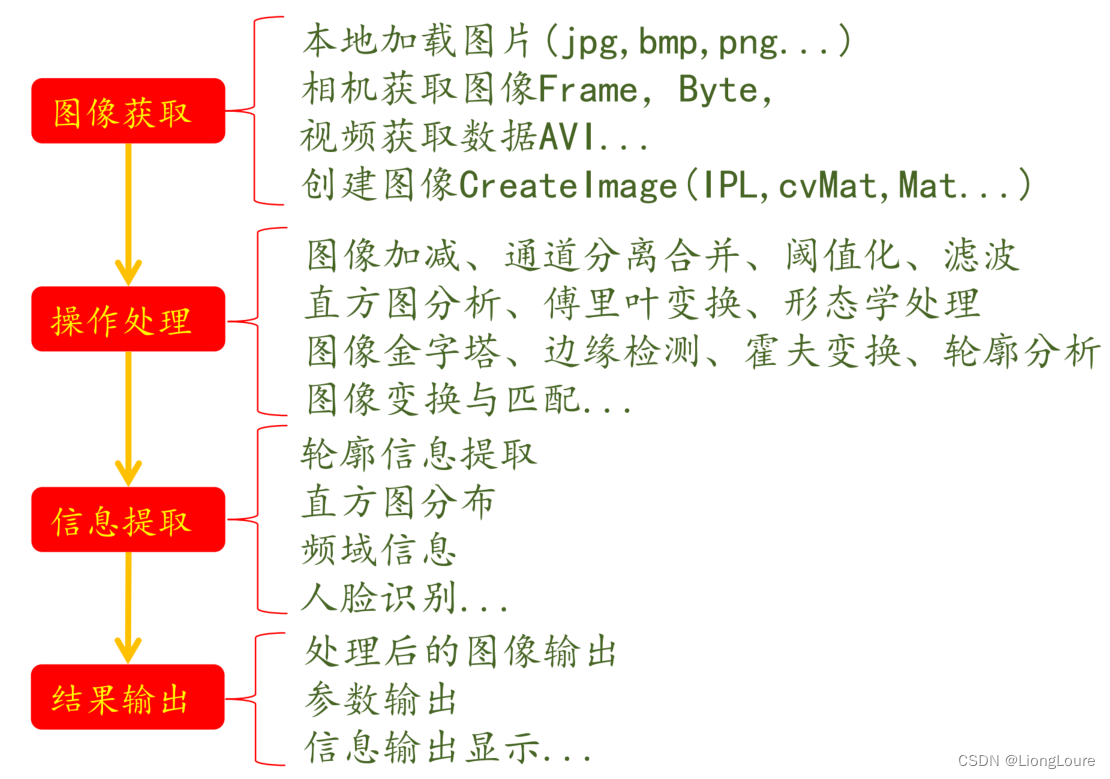
24. 图像处理OpenCV
OpenCV(Open Source Computer Vision Library)是基于(免费开源)发行的跨平台计算机视觉库,可以Linux、Windows、Android、ios从一系列C函数和少量操作系统来看,它是轻量级和高效的C 同时提供类组成Python、Ruby、MATLAB语言界面实现了许多通用算法的图像处理和计算机视觉。
参考网址
http://docs.opencv.org/3.0-beta/doc/py_tutorials/py_tutorials.html
https://opencv-python-tutroals.readthedocs.io/en/latest/py_tutorials/py_tutorials.html
http://docs.opencv.org/2.4/genindex.html
OpenCV模块简介:
import cv2
【core】–包括核心功能模块OpenCV基本数据结构和绘图函数等
【imgproc】–Image/Process,与滤波、几何变换、直方图有关, 特征检测、运动分析、形状描述等
【highgui】–高层图形用户界面包括媒体输入输出、视频捕获、 图像和视频的编码解码、图形交互界面接口等
【calib3d】–Calibration和3D,相机标定和三维重建
【contrib】–新的人脸识别、立体匹配、人工视网膜模型等技术
【features2d】–2D功能框架主要包括特征检测、描述和接口
【flann】–快速最近搜索算法和聚类
【gpu】–运用GPU计算机视觉模块加速
【legacy】–(弃用)包括运动分析、平面细分、描述符提取等。
【ml】–Machine Learning,机器学习模块
【objdetect】–目标检测模块(级联分类器和SVM)
【photo】–包括图像修复和图像去噪
【stitching】–图像拼接模块
【……】
OpenCV安装
pip install opencv-python
import cv2 print(cv2.__version__) 一个简单的程序
import cv2 #图像的基本操作 img = cv2.imread

        (
        'datas/fengjing.jpg'
        ) cv2
        .imshow
        (
        'img'
        ,img
        ) k
        = cv2
        .waitKey
        (
        0
        )
        # 等待按键
        print
        (k
        )
        if k
        ==
        27
        :
        # wait for ESC key to exit cv2
        .destroyAllWindows
        (
        )
        elif k
        ==
        ord
        (
        's'
        )
        :
        # wait for 's' key to save and exit cv2
        .imwrite
        (
        'datas/messigray.png'
        ,img
        ) cv2
        .destroyAllWindows
        (
        )
        # 销毁所有窗口
24.1 图像读取、显示、保存
OpenCV图像处理系统一般组成:
24.1.1 图像的基本操作
图像读取:cv2.imread()
窗口创建:cv2.namedWindow()
图像显示:cv2.imshow()
图像保存:cv2.imwrite()
资源释放:cv2.destroyWindow()
import cv2
#图像的基本操作

img = cv2.imread('datas/fengjing.jpg')  # 读取图像
cv2.imshow('img',img)  # 显示原图

hsv_img = cv2.cvtColor(img,cv2.COLOR_BGR2HSV)  # 转为HSV图像
cv2.namedWindow("hsv",cv2.WINDOW_AUTOSIZE)  # 创建hsv窗口

cv2.imshow("hsv",hsv_img)  # 显示hsv图像
cv2.imwrite("hsv.jpg",hsv_img)  # 保存hsv图像
cv2.waitKey(0)  # 等待按键按下
cv2.destroyAllWindows()  # 销毁所有窗口
cv2.imread(filename, [flags])
第一个参数,需要填入图片路径名,支持如下格式:
· Windows bitmaps -*.bmp,*.dib(always supported)
· JPEG files-*.jpeg,*.jng,*.jpe(see the Motes section)
· JPEG 2000 files -*.jp2(see the Ntes section)
· Portable Network Graphics -*png(see the Motes section)
· Portable image format-*.pbm,*.pgm,*.ppm(always supported)
· Sun rasters -*.sr,*.ras(always supported)
· TIFF files -*.tiff,*.tif(see the Notes section)
注意路径格式用\或/,同时路径中不要有中文
第二个参数,指定加载图像的颜色类型 ,默认为1:
cv2.IMREAD cOLOR# 读入彩色图像,透明度被忽略,对应宏定义为1(默认参数)
cv2.IMREAD GRAYSCALE# 以灰度模式读入图像,对应宏定义为0
cv2.IMREAD UNCHANGED# 读入图像包含alpha通道,对应宏定义为-1
警告∶就算图像的路径是错的,OpenCV 也不会提醒你的,但是当你使用命令print img时得到的结果是None。
通过判断img是否为None来避免异常发生
import cv2

img0 = cv2.imread('datas/fengjing.jpg', cv2.IMREAD_GRAYSCALE)#0
if img0 is None:
    print('imgread is error')
else:
    print('imgread is ok')
    cv2.imshow('img0',img0)
    print(img0.shape)  # (546,820) 一个通道

img1 = cv2.imread('datas/fengjing.jpg', 1)#0
if img0 is None:
    print('imgread is error')
else:
    print('imgread is ok')
    cv2.imshow('img1',img1)
    print(img1.shape)  # (546,820,3) 三个通道

# 不同通道下的灰度图——RGB
img1_0 = img1[..., 0]
img1_1 = img1[..., 1]
img1_2 = img1[..., 2]
cv2.imshow('img1_0',img1_0)
cv2.imshow('img1_1',img1_1)
cv2.imshow('img1_2',img1_2)
cv2.waitKey(0)
namedWindow(winnname, [flags])
第一个参数,表示窗口名称,传入字符串即可
第二个参数,窗口显示方式,取值如下:
cv2.WINDOW NORMAL# 正常大小显示,用户可以改变窗口大小
cv2.WINDow AUTOSIZE# 根据图像大小自动调整,用户不能手动改变窗口大小
imshow(winnname, mat)
第一个参数,设置需要显示的窗口名称
第二个参数,填写需要显示的图像
imwrite(filename, img, [params])
第一个参数,设置保存的文件名,需填写后缀,如"1.bmp"
第二个参数,要保存的Mat类型图像数据
第三个参数,表示特定格式保存的参数编码,一般采用默认值不填写
对于JPEG,其表示的是图像的质量,用0~100的整数表示,默认为95
对于PNG,第三个参数表示的是压缩级别,从0到9,压缩级别越高,图像尺寸越小,默认级别为3
waitKey([delay])
第一个参数,如果delay>0, 表示等待delay毫秒之后结束; 如果delay=0, 表示无限等待,直到有按键按下结束
返回值为对应按下按键的ASCII码值, 如Esc的ASCII码为27
k = cv2.waitKey(0)
print(k)
if k == 27:         # wait for ESC key to exit
    cv2.destroyAllWindows()
elif k == ord('s'): # wait for 's' key to save and exit
    cv2.imwrite('datas/messigray.png',img)
    cv2.destroyAllWindows()
destroyWindow(winname) / destroyAllWindow()
cv2.destroyWindow()销毁指定窗口,参数填窗口名称
cv2.destroyAllWindows()销毁所有打开的GUI窗口
img is None判断图像是否为空(读取是否成功)
img.shape[0]获取图像行数(高度)
img.shape[1]获取图像列数(宽度)
img.shape[2]获取图像通道数
img.size获取总的像素个数(宽度x高度x通道数)
img.dtype获取图像的数据类型
import cv2
import matplotlib.pyplot as plt
import numpy as np

img = cv2.imread('datas/fengjing.jpg')
#cv2显示 BGR
cv2.imshow('cv2', img)
cv2.waitKey(0)
#matlab显示 RGB
plt.imshow(img)
plt.show()
#顺序调整
plt.imshow(img[:,:,::-1])
plt.show()

# Release everything if job is finished
cv2.destroyAllWindows()
24.1.2 摄像头/视频读取、写入
VideoCapture类: OpenCV2.x及以上版本新增VideoCapture类,提供了从摄像机或视频文件捕获视频的C++接口。
VideoCapture类三种构造函数方法:
Python:
cv2.VideoCapture() →
Python:cv2.VideoCapture(filename) →
Python:ev2.VideoCapture(device) →
参数说明:
参数filename表示输入视频文件的路径及名称
device表示打开摄像头索引号
取帧方法:
Python: cv2.VideoCapture.read([image]) → retval, image
import cv2

# 视频的基本操作 —— 单帧图片
cap = cv2.VideoCapture(0)  # device
ret, frame = cap.read()  # ret是否能取到帧,frame帧图片(ndarray)
cv2.imshow('frame', frame)
cv2.waitKey(0)
cv2.destroyAllWindows()
import cv2

# 视频的基本操作 —— 视频
cap = cv2.VideoCapture(0)  # device
ret, frame = cap.read()  # ret是否能取到帧,frame帧图片(ndarray)
count = 0
while True:
    count += 1
    ret, frame = cap.read()
    if not ret:
        break
    if count > 240:
        cap.release()
    # frame = cv2.cvtColor(frame, cv2.COLOR_BGR2GRAY)#颜色空间转换
    cv2.imshow('frame', frame)
    cv2.waitKey(1)
VideoCapture类常用函数功能:
cv2.VideoCapture.open(filename) → retval
cv2.VideoCapture.open(device) → retval
如果不能指定摄像头——(0, CAP_DSHOW) DirectShow,windows系统的视频管理系统
open()—打开视频文件或者摄像头
#cap = cv2.VideoCapture(0) #device
cap = cv2.VideoCapture('datas/vedioplay.mp4') #filename
# cap = cv2.VideoCapture()
# cap.open('datas/vedioplay.mp4')
cv2.VideoCapture.isOpened()→ retval
isOpened()–判断读取视频文件是否正确,正确返回true
print(cap.isOpened())
cv2.VideoCapture.release() → None
release()—关闭视频流文件
cv2.VideoCapture.grab()→ retval
grab()—抓取下一帧的视频文件或设备
cv2.VideoCapture.retrieve([image[,channel]]) → retval, image → retval, image
retrieve()—解码并返回视频帧
cv2.VideoCapture.get(propId) → retval
get()—返回指定视频类的相关参数信息
cv2.VideoCapture.set(propId,value) → retval
set()—设置类信息的一个属性
# 视频属性
import cv2
cap = cv2.VideoCapture('datas/vedioplay.mp4')

# 帧率
fps = cap.get(cv2.CAP_PROP_FPS)  # 25.0
print("Frames per second using video.get(cv2.CAP_PROP_FPS) : {0}".format(fps))

# 总共有多少帧
num_frames = cap.get(cv2.CAP_PROP_FRAME_COUNT)
print('共有', num_frames, '帧')
#
frame_height = cap.get(cv2.CAP_PROP_FRAME_HEIGHT)
frame_width = cap.get(cv2.CAP_PROP_FRAME_WIDTH)
print('高:', frame_height, '宽:', frame_width)

#FRAME_NOW = cap.get(cv2.CAP_PROP_POS_FRAMES) # 第0帧
#print('当前帧数', FRAME_NOW) # 当前帧数 0.0

# Release everything if job is finished
cap.release()
读取视频:
说明:视频读取本质上就是读取图像,因为视频是由一帧一帧图像组成的。
- 读取视频的两种方法:
# 1
cap = cv2.VideoCapture('datas/vedioplay.mp4') #filename

# 2
cap = cv2.VideoCapture()
cap.open('datas/vedioplay.mp4')
- 循环显示每一帧:
while True:
    ret, frame = cap.read()
    if not ret:  # ret == False
        break
    hsv_frame = cv2.cvtColor(frame, cv2.COLOR_BGR2GRAY) # 颜色空间转换
    cv2.imshow('frame',  hsv_frame)
    if cv2.waitKey(10) & 0xFF == 27:
        cv2.imwrite('1.bmp', hsv_frame)
        print('1')
几点说明:
打开的视频可以是本地视频如:
cv2.VideoCapture cap("1.avi");
也可以是网络视频如:cv2.VideoCapture cap("http://www.laganiere.name/bike.avi");读取视频一定要加异常判断
① 打开视频失败(各种原因)
② 取帧失败异常(程序结尾判断)
ex1:if(cap.isopened())∶#检查打开是否成功
ex2:ret,frame = cap.read() # if(frame is None)∶# 判断当前帧是否为空 if ret==False∶# 判断取帧是否失败 break
写入视频:
- VideoWriter:
Opencv提供VideoWriter类写视频文件,类的构造函数可以指定文件名、播放帧率、帧尺寸、是否创建彩色视频。
cv2.VideoWriter([filename, fourcc, fps, frameSize[, isColor]) →
· filename - Name of the output video file.
· fourcc - 4-character code of codec used to compress the frames. For example,CV_FOURCC(‘P’,‘I’,‘M’,‘1’)is a MPEG-1 codec, CV_FOURCC('M,‘J’,‘P’,‘G’) of codes can be obtained atVideo Codecs by FOURCCpage.
· fps - Framerate of the created video stream.
· frameSize - Size of the video frames.
· isColor - If it is not zero,the encoder will expect and encode color frames,otherwise it will work with grayscale frames(the flag is current)
- 写入帧方法
fourcc = cv2.VideoWriter_fourcc(*'XVID')
out= cv2.VideoWriter('output.avi',fourcc,20.0,(640,480))
out.write(frame)
- 注意事项:
写入视频前需安装对应的编解码器
生成视频是否支持彩色应与构造函数设置一致
生成视频尺寸需与读取视频尺寸一致
视频保存
import cv2
cap = cv2.VideoCapture('datas/vedioplay.mp4')
height = cap.get(cv2.CAP_PROP_FRAME_HEIGHT)
width = cap.get(cv2.CAP_PROP_FRAME_WIDTH)

#写入帧方法
fourcc = cv2.VideoWriter_fourcc(*'MJPG')  # opencv 3.0 #cv2.VideoWriter_fourcc('X','V','I','D')

#创建一个视频写入对象 VideoWriter
out = cv2.VideoWriter('datas/output20220617-1.mp4', fourcc, 20.0, (int(width), int(height)))
while cap.isOpened():
    ret, frame = cap.read()
    if not ret:
        break
    out.write(frame)

# Release everything if job is finished
cap.release()
cv2.destroyAllWindows()
24.1.3 简单实例应用
视频分解: 读取视频并分解为一张一张的图片保存
批量读取图片:
- 有序图片读取:根据图片名的规律来对文件名进行格式化,然后统一读入;
- 无序图片读取:文件名无规律,通过Windows相关方法读取。
**图片合成视频:**将一张一张的图片合成为视频保存
import cv2
import os
import random

# 1.读取datas/2-PI231imgs文件夹中的任意一张图片,并查看该图片的通道数。
path_org = r"F:\2-PI231imgs"  # 文件夹路径
File_in_path = os.listdir(path_org)  # 获取该文件夹下所有的文件名 的一个列表
random.seed(10)
Choice_File = random.choice(File_in_path)  # 随机抽取一个文件
path_get = os.path.join(path_org,Choice_File)  # 随机文件的地址

img_get = cv2.imread(path_get)  # 读取文件图片(默认为彩色图)

if img_get is None:
    print(f'文件{
          Choice_File}读取地址有误')
else:
    print(f'文件{
          Choice_File}的通道数为{
          img_get.shape[-1]}')


# 2.将 datas/2-PI231imgs文件夹中的图片保存成格式为mp4的视频
Files_in_path = [os.path.join(path_org,File_path) for File_path in File_in_path]
print(Files_in_path)
# 获取文件的尺寸大小
test_img = cv2.imread(Files_in_path[0])
if test_img is None:
    print("图片读取错误!")
else:
    height = int(test_img.shape[0])
    wid = int(test_img.shape[1])
    print(height,wid)
    fourcc = cv2.VideoWriter_fourcc(*'XVID')
    out= cv2.VideoWriter('output.avi',fourcc,20,(wid,height))
    for path in Files_in_path:
        img_in_path = cv2.imread(path)
        # cv2.waitKey(3)
        # cv2.imshow('test',img_in_path)
        out.write(img_in_path)


out.release()
cv2.destroyAllWindows()
print('视频以保存')
24.2 常用数据结构与颜色空间
24.2.1 OpenCV常用数据结构
- Point类
Point类数据结构表示二维坐标系的点,由坐标x, y指定的2D点,Python中直接用元组(x,y) - Rect类
Rect类用来表示矩形,成员有x,y, width, height,Python中直接用元组(x,y,w,h)
- Size类
Size表示区域大小,常用构造函数Size(int _width, int _height),Python中直接用元组(width, height) - Scalar类
Scalar()表示具有四个元素的数组,大量用来传递像素值,如RGB颜色,Python中直接用元组(B, G, R)
一般形式:Scalar(double B, double G, double R, double Alpha)
如果用不到第四个则表示Scalar(B, G, R), 其中:B—表示蓝色分量,G—表示绿色分量,R—表示红色分量,Alpha—表示透明度
注意:Scalar表示颜色顺序为BGR
Scalar(255, 0, 0) ----表示纯蓝色
Scalar(0, 255, 0) ----表示纯绿色
Scalar(0, 0, 255) ----表示纯红色
Scalar(255, 255, 0) ----表示青色
Scalar(0, 255, 255) ----表示黄色
24.2.2 图像基础
- 基础图像容器:
Python用numpy来操作 - Numpy相关属性简介:
np is None数组是否为空
np.shape数组行,列,维度
img.size数组元素总个数
img.dtype数组元素数据类型 - Numpy相关方法简介:
np.zeros()创建全为元素0的数组
np.ones()创建全为元素1的数组
np.eye()创建对角线元素全为1的数组
np.copy()数组深拷贝
import numpy as np
import cv2

# img=np.zeros((512,512,3),np.uint8)
# img=np.ones((512,512,3),np.uint8)
img=np.eye(100,100)
img = 255 * img
# print(img)
cv2.imshow("img",img)
cv2.waitKey(0)
cv2.destroyAllWindows()
- 常用颜色空间介绍:
RBG颜色空间——R/G/B取值范围[0,255]
HSV/HLS颜色空间——H取值范围[0,360],S/V取值范围[0,1]
H:色调,0度(红色)
S:饱和度,接近某种光谱色的程度,值越大表示越接近。
V:亮度,值越大亮度越高。
主要用于:颜色识别(跟踪)
Lab颜色空间——L取值范围[0,100]a/b取值范围[127,-128]
import numpy as np
import cv2

size = (2560, 1600)
# 全黑.可以用在屏保
black = np.zeros(size)
black[225:300] = 255
# black[:,225:300] = 255
black[34,56] = 255
print(black[34][56])
cv2.imshow('black', black)
cv2.waitKey(0)
cv2.imwrite('black.jpg',black)

#white 全白
black[:]=255
print(black[34][56])
cv2.imshow('white', black)
cv2.waitKey(0)
cv2.imwrite('white.jpg',black)
24.2.3 基本绘图函数
OpenCV常用绘图函数:
cv2.line()函数------用于绘制直线
cv2.circle()函数------用于绘制圆
cv2.rectangle()函数------用于绘制矩形
cv2.ellipse()函数------用于绘制椭圆
cv2.fillPoly()/polylines()函数-----用于绘制多边形
cv2.putText()函数------用于添加文字
绘制直线——
cv2.line()
cv2.line(img,pt1, pt2, color[, thclaness[, lineTye[, shift]]]) → None
绘制圆——
cv2.circle()
cv2.circle(img, center,radius,color[,thickness[, lineType[,shift]]]) → None
Opencv2—cv2.CV_AA, OpenCV3—cv2.LINE_AA
绘制矩形——
cv2.rectangle()
cv2.rectangle(img,pt1,pt2,color[,thickness[,lineType[, shift]]]) → None
绘制椭圆——
cv2.ellipse()
cv2.ellipse(img,center, axes,angle, startAngle,endangle,color[,thickness[,lineTye[,shift]]]) → None
cv2.ellipse(img, box,color[,thicknese[,linetype]]) → None
绘制多边形——
cv2.fillPoly()/cv2.polylines()
cv2.fillPoly(img,pts,color[,lineType,shift[,offset]]]) → None
cv2.polylines(img,pts,isClosed,color[, thickmess[,lineType[,shift]]])→ None
添加文字——
cv2.putText()
cv2.puText(img, text, org, fontFace, fontScale, color[, thickness[, lineType[, bottomleftOrigin]]])→ None
# -*- coding: utf-8 -*-
import numpy as np
import cv2

''' • img: 你想绘制图形的 幅图像。 • color: 形状的颜色。以RGB为例,需要传入一个元组 BGR 例如 255,0,0 代表蓝色,第一个是蓝色通道,第二个是绿色通道,第三个是红色通道。对于灰度图只需要传入灰度值。 • thickness 线条的粗细。如果给一个闭合图形置为 -1 那么这个图形就会被填充。默认值是 1. • linetype 线条的类型, 8 连接,抗锯齿等。 默认情况是8 连接。cv2.LINE_AA 为抗锯齿,这样看起来会非常平滑。 '''
#0 1 2 3.....255

# Create a black image
img = np.ones((512, 512, 3), np.uint8)
cv2.imshow(winname='img', mat=img)
cv2.waitKey(1)
# Draw a diagonal blue line with thickness of 5 px
cv2.line(img, pt1=(0, 0), pt2=(511, 511), color=(255, 0, 0), thickness=5)  # pt1, pt2, color, thickness=5

# cv2.polylines() 可以用来画很多条线。只需要把想画的线放在一 个列表中,
# 将列表传给函数就可以了。每条线会被独立绘制。这会比用 cv2.line() 一条一条的绘制要快一些。
# cv2.polylines(img, pts, isClosed, color, thickness=None, lineType=None, shift=None)

cv2.arrowedLine(img,pt1=(151, 401), pt2=(21, 13), color=(255, 0, 0), thickness=5)

cv2.rectangle(img, (384, 0), 

