超声波距离传感器的制作
时间:2020-11-30 10:21:25
第一步: 所需的电气元件
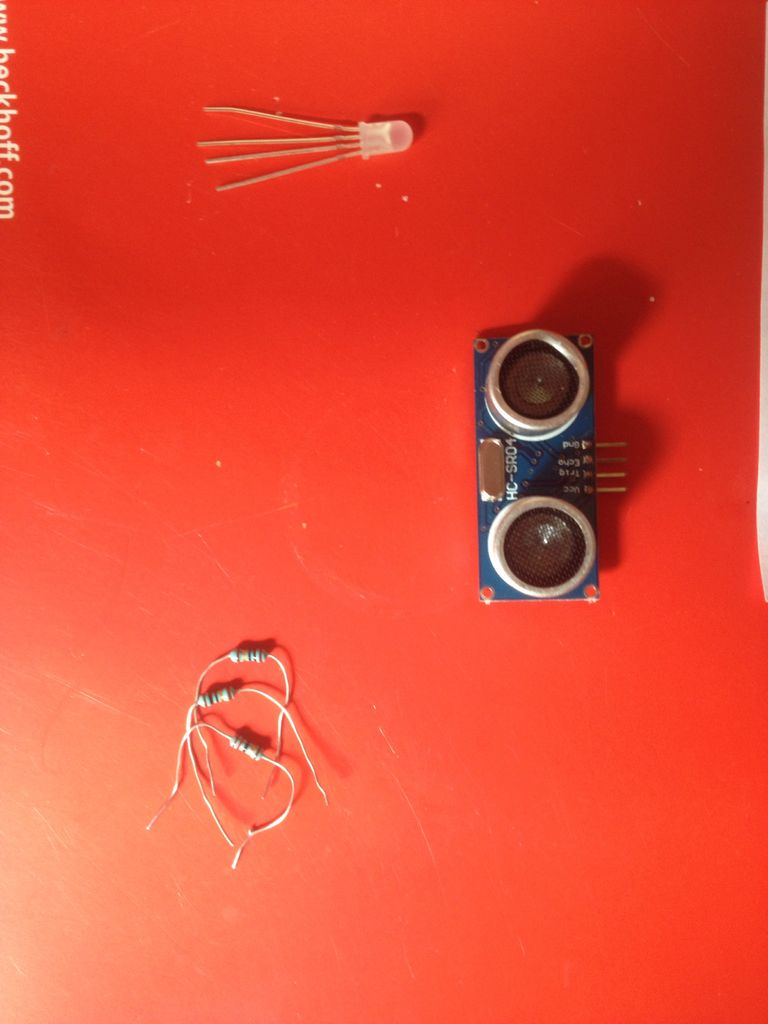
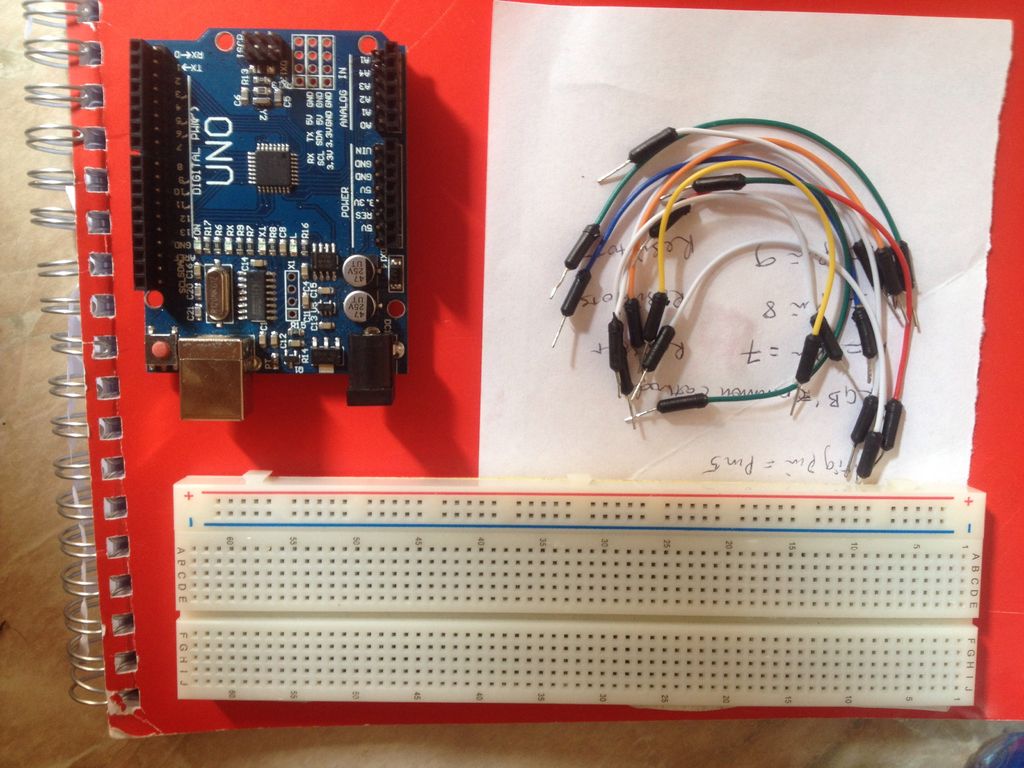
这是电气零件清单,一个人需要完成这个项目-br-Arduino板
-跳线
-RGB led(我使用的是公共需要阴极,但单个LED也可以提高工作)
-3电阻。
-面包板
-HC-SRO4。
所有这些都连接起来
步骤2:连接


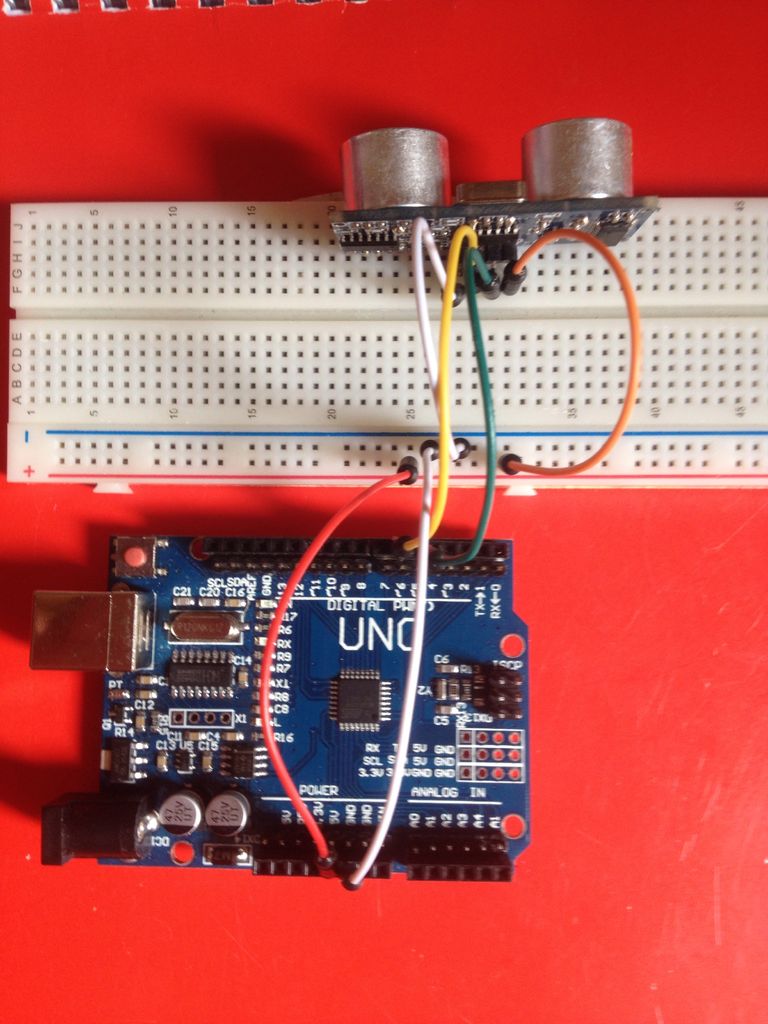

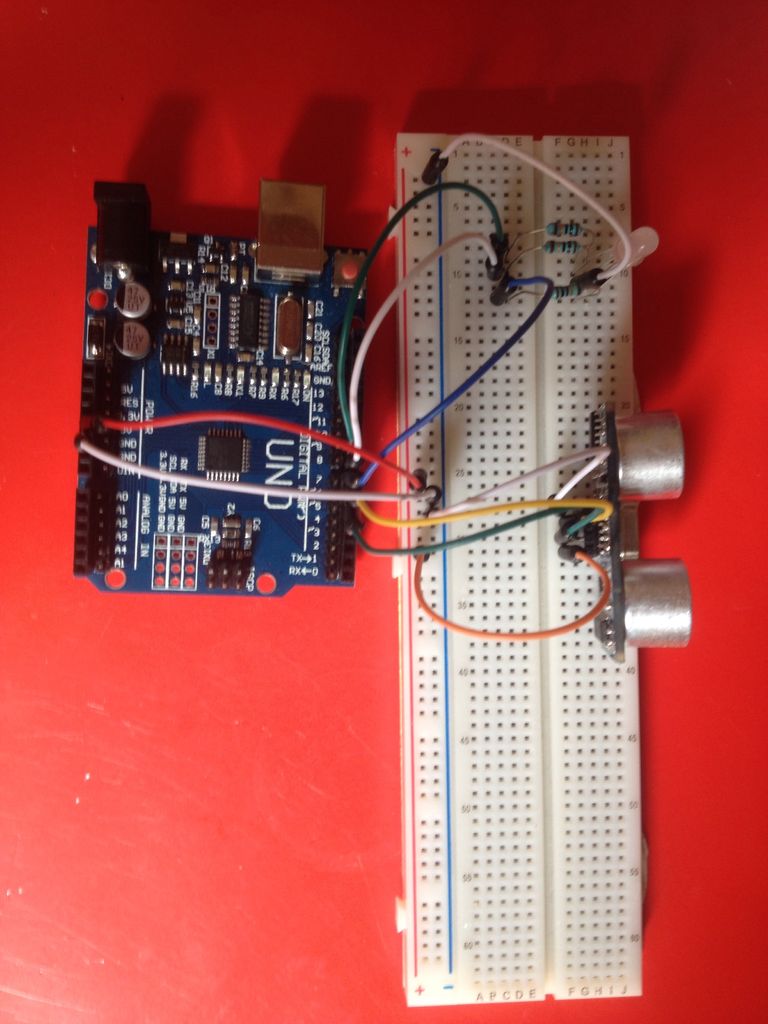
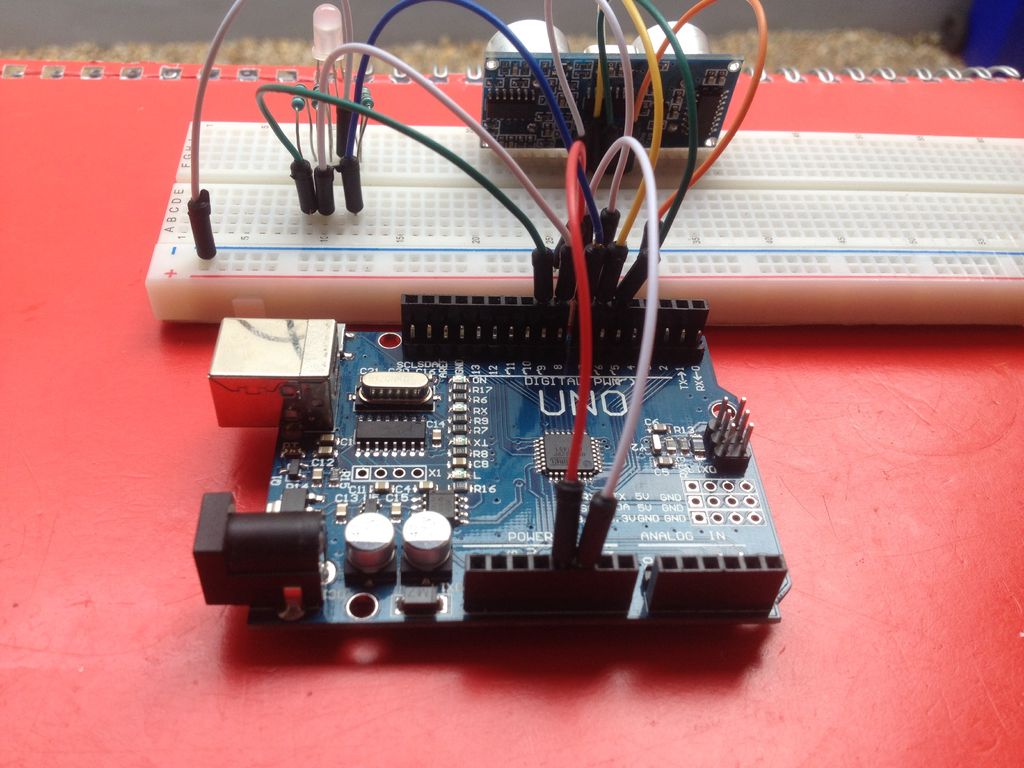
从Arduino + 5v向面包板提供+ 5v并执行情况相同的操作为一个地面。
将HC-SR04安装在测试板上。 请记住,在数字电子类别中,规则的垂直引脚连接在板上,水平引脚连接在电源上。
把感应器连接到 gnd 和5v。
连接一个回波针将HC-SR04的引脚连接到Arduino的引脚5,并通过Trig引脚可以将其连接到Arduino板的引脚6。
安装一个面包板上的LED。将电阻连接到RGB引脚,分别将它们可以分别连接到Arduino的引脚7,8和9,并将作为阴极保护接地。
步骤3:代码

连接后,编写并上传具有以下主要代码。
************************* ************************************************** *************
#define trigpin 6
#define echopin 5
#define R 7
#define G 8
#define B 9
void setup()
Serial Monitor and pin settings.
Serial.Begin(9600);
pinMode(trigpin,OUTPUT); //set trigpin as output
pinMode(echopin,INPUT);//set echopin as input
pinMode(R,OUTPUT);// set R,G and B as outputs
PINMODE (G, output) ;
pinMode(B,OUTPUT);
//Put your setup code here and run it once:
}
void loop()
{
//the trigpin sends out a signal, which bounces off an obstacle and comes back, the
//echopin recieves this signal and gives out +5v setting the arduino pin on which it is connected to high.
Distance = time * Speed, but this distance is divided by 2 because the signal it's sending is returned
so distance =(time required for signal departure and return)/2.
//i.e if the time is 6s the distance = (6s/2) = 3m or cm.
int duration, distance;//declare distance and duration as integers
Number write (Trigpin, high);/ Trigin send signal
_delay_ms (1000); // Positive to face 1000ms
digitalWrite(trigpin, LOW);// then goes low
pulse = duration (acanthin, high);/ duration is acanthin pulse
Distance = (duration/2)/29.1;//29.1 is used to convert the distance to CM, other units have different values.
if(distance 》 0 && distance 《= 20){ //distcance is greater than 0 and less than 20cm
digitalWrite(G,LOW);//green led is off
Digital write (B, Low) ;//Blue led off
_delay_ms(500);//delay
Number write (R, high);/ red LED open
Delay MS (500) ;
}
else if(distance 》 20 && distance 《= 80){ //distcance is greater than 20 and less than 80cm
Digital Write (R, low) ;//Red led off
digitalWrite(G,LOW);//green led is off
Delay MS (500) ;
Number write (B, high);/ blue LED open
}
else if(distance 》 80 && distance 《= 120 ){ //distcance is greater than 80 and less than 120cm
Digital Write (R, low) ;//Red led off
Digital write (B, Low) ;//Blue led off
Delay MS (500) ;
Number write (G, high);/ green LED open
}
Serial.print(“cm”);
Serialmonitor on serialmonitor. Println (distance) ;//print value
delay_ms(100);_
}
// put your main code here, to run repeatedly:
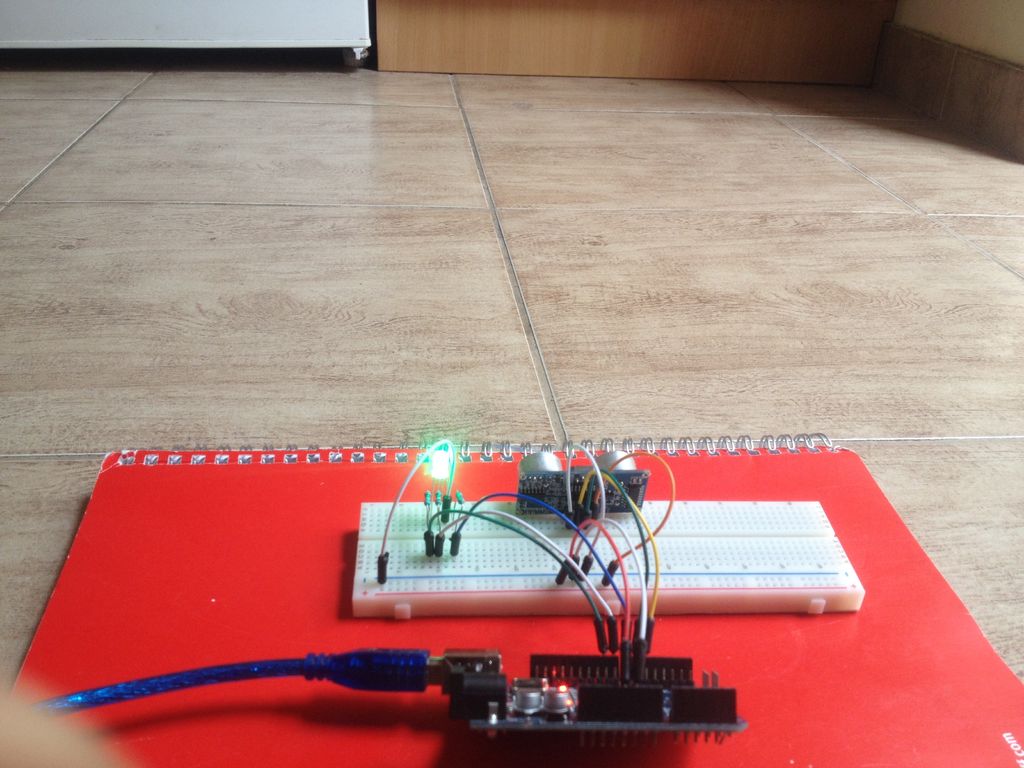
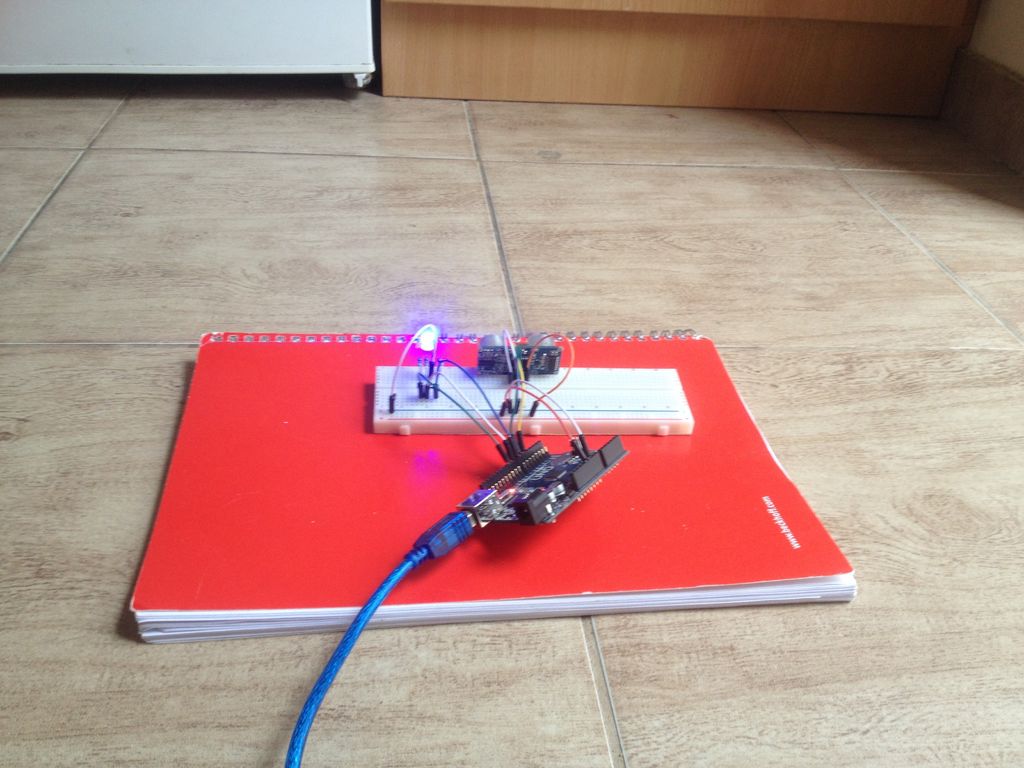
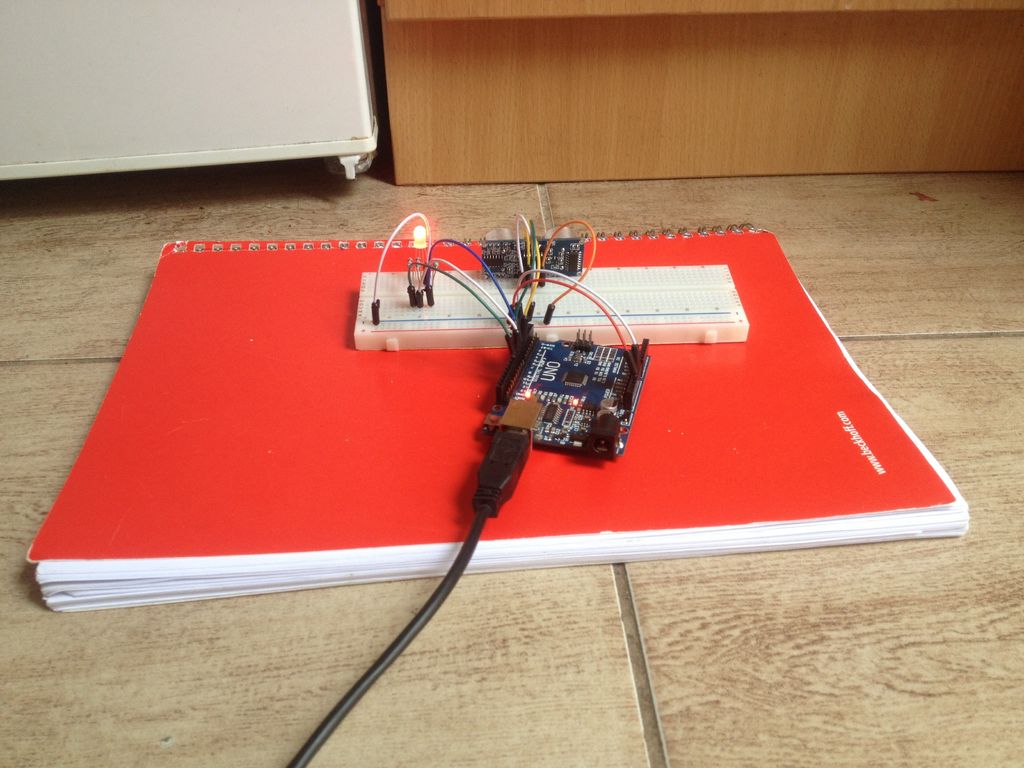
步骤4:测试
我公寓的地板设计上有很多瓷砖,您可以通过看到距我的橱柜和冰箱的距离。 LED呈绿色,当距离减半时已经变为一个蓝色,而当传感器技术确实需要靠近时变为中国红色。我希望你喜欢我们这个。我打算做一种类似的事情,但我将使用MQ-2烟雾温度传感器来更改LED的颜色。